Boost your business's online presence effortlessly with HiFiveStar, driving more revenue through hundreds of positive reviews. Our platform not only automate review collection via SMS, Email, WhatsApp, or QR code, boosting positive feedback, but also amplify your SEO, PPC, and social media impact. Plus, enjoy the power of reputation protection and insightful review management, all without any advertising costs. Let's transform your business into a customer favorite!

✅ Up to 18% more revenue
✅ Up to 20% more positive reviews
✅ Up to 270% higher website conversion
✅ Stronger SEO, PPC, and marketing results
✅ Smart resolution of customer issues, protecting your reputation
✅ Grow with customer feedback
✅ Enhanced customer satisfaction
✅ In-depth sentiment analysis for smarter decisions
Ready to take your online reputation to the next level?
Connect HiFiveStar with various review platforms to manage all your reviews in one place, enhancing efficiency and oversight.
Steps: Navigate to Settings >> Integrations → Select a platform → Click Integrate and follow the setup instructions.
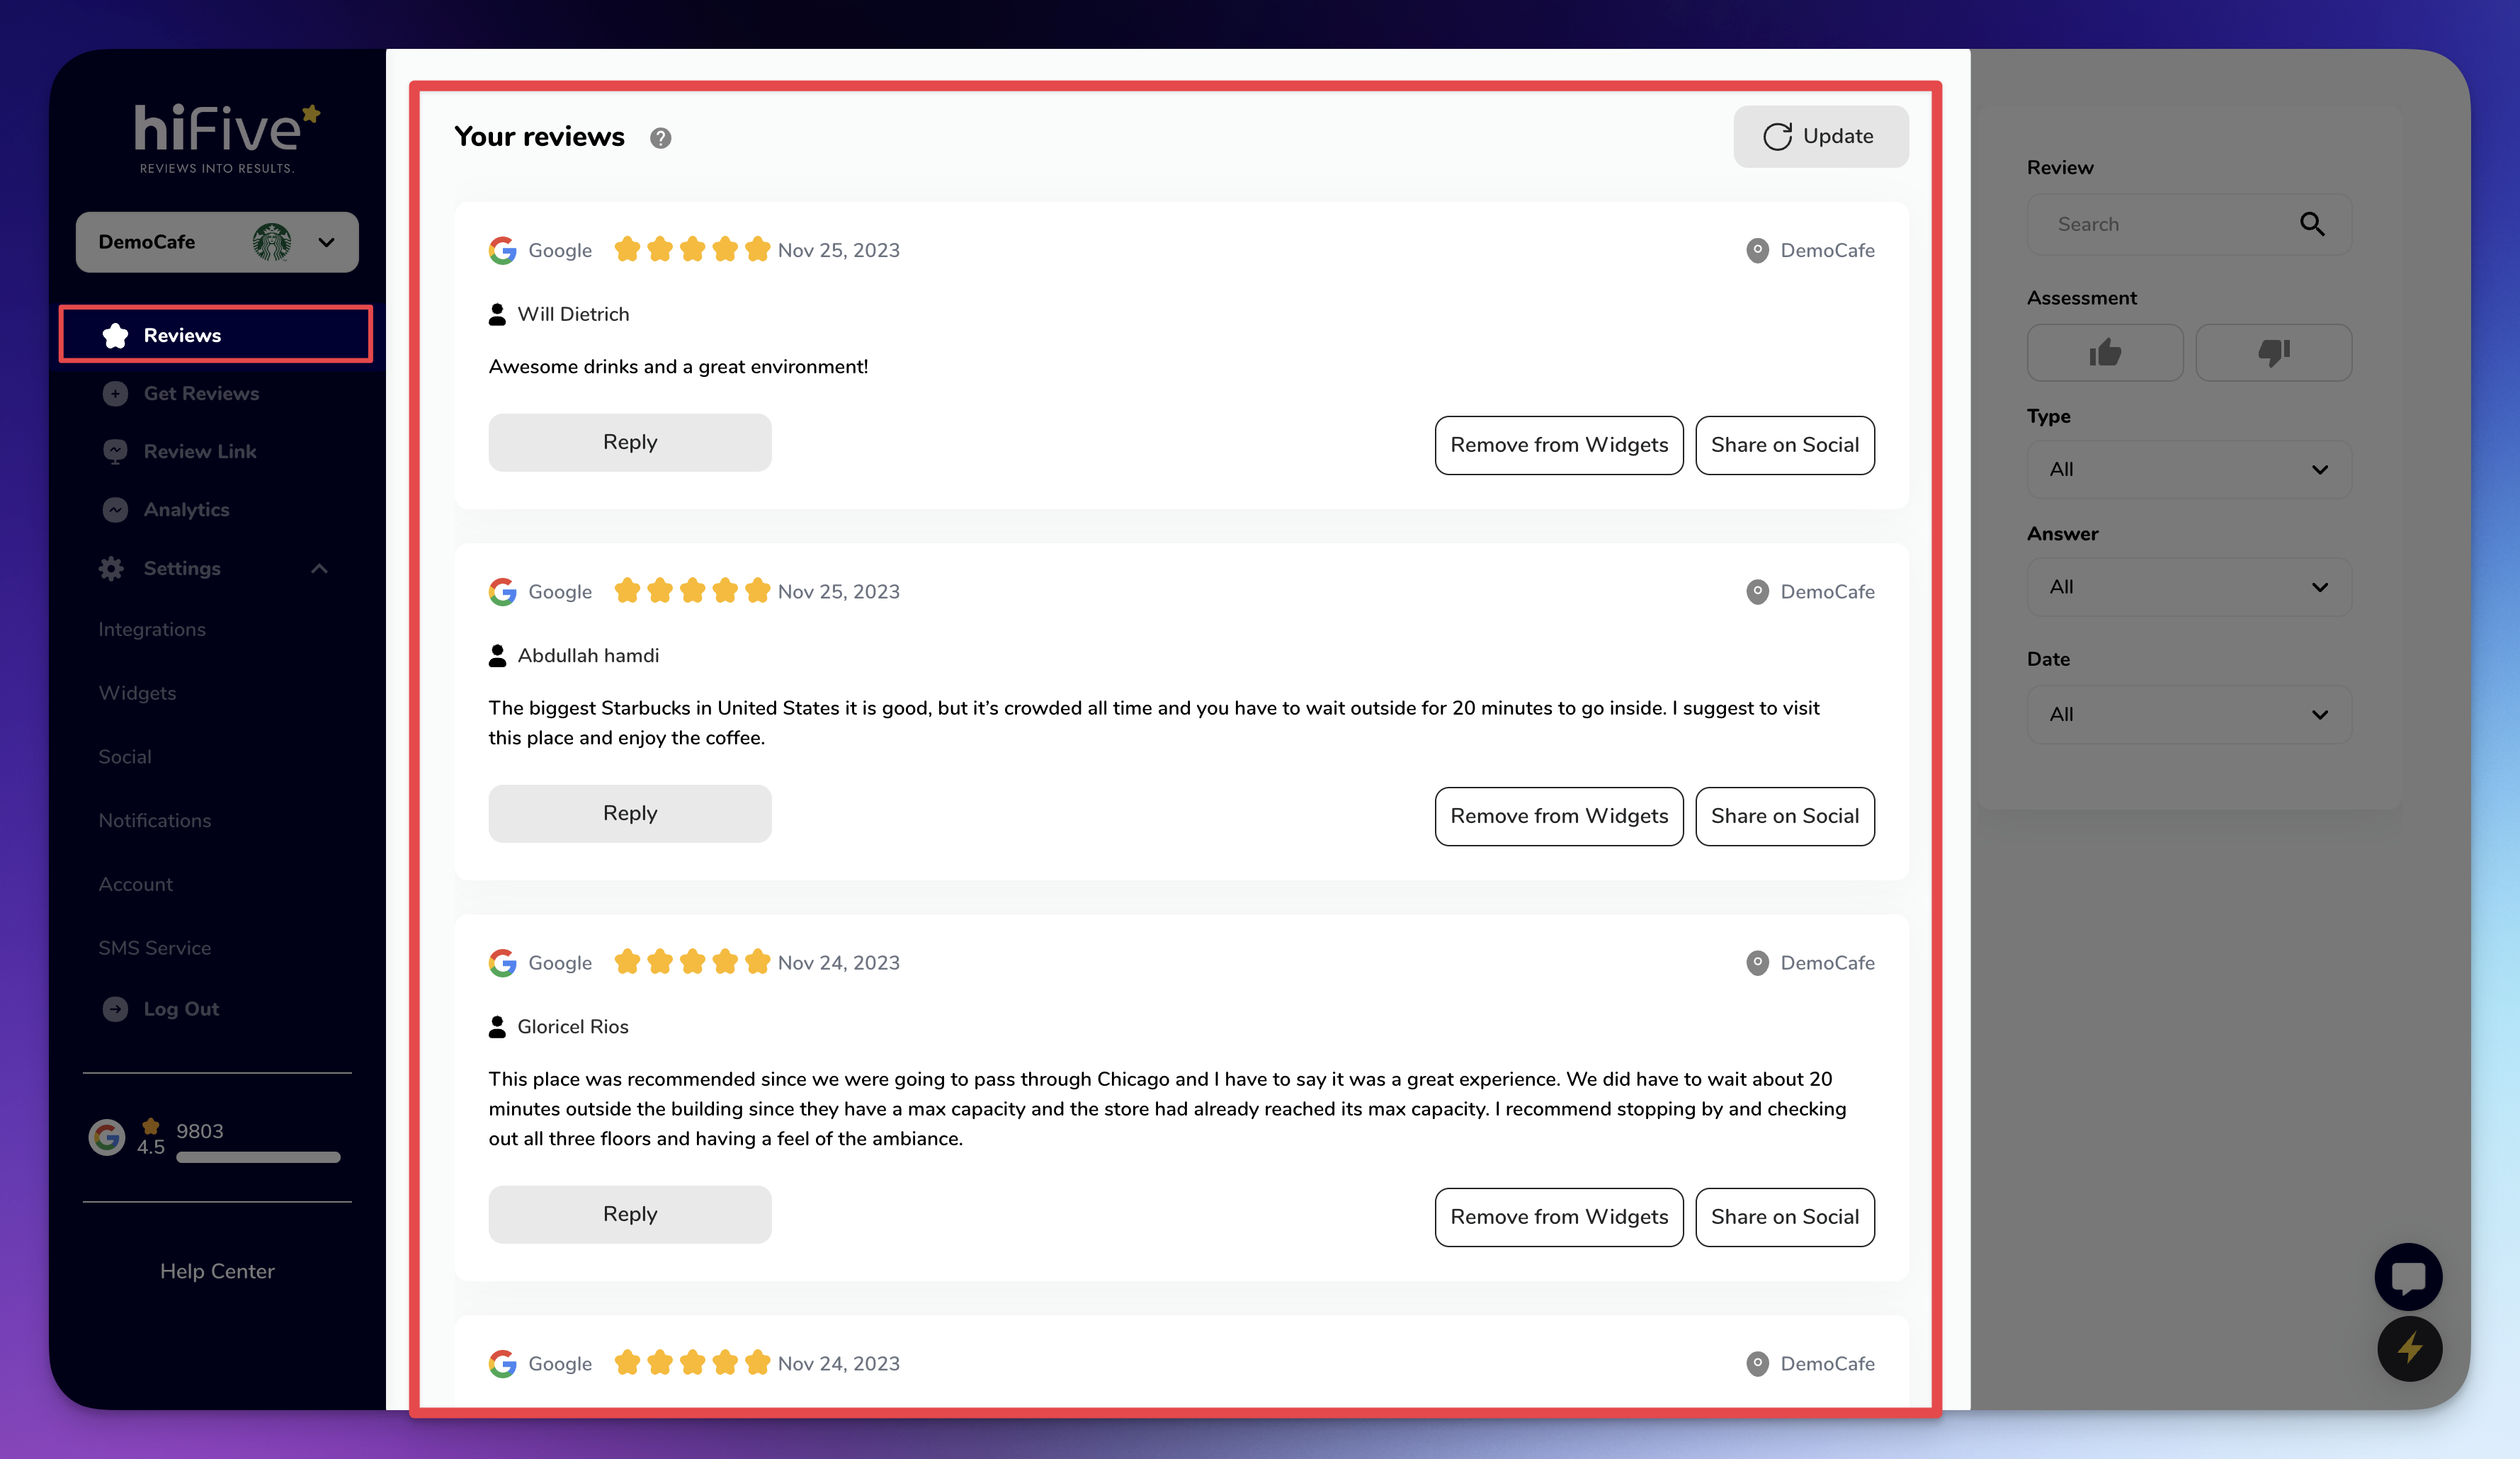
Keep an organized track of customer reviews, respond promptly, and maintain your business’s online reputation.
Automatic Updates: The platform feed refreshes four times daily with new reviews, ensuring you're always up-to-date.
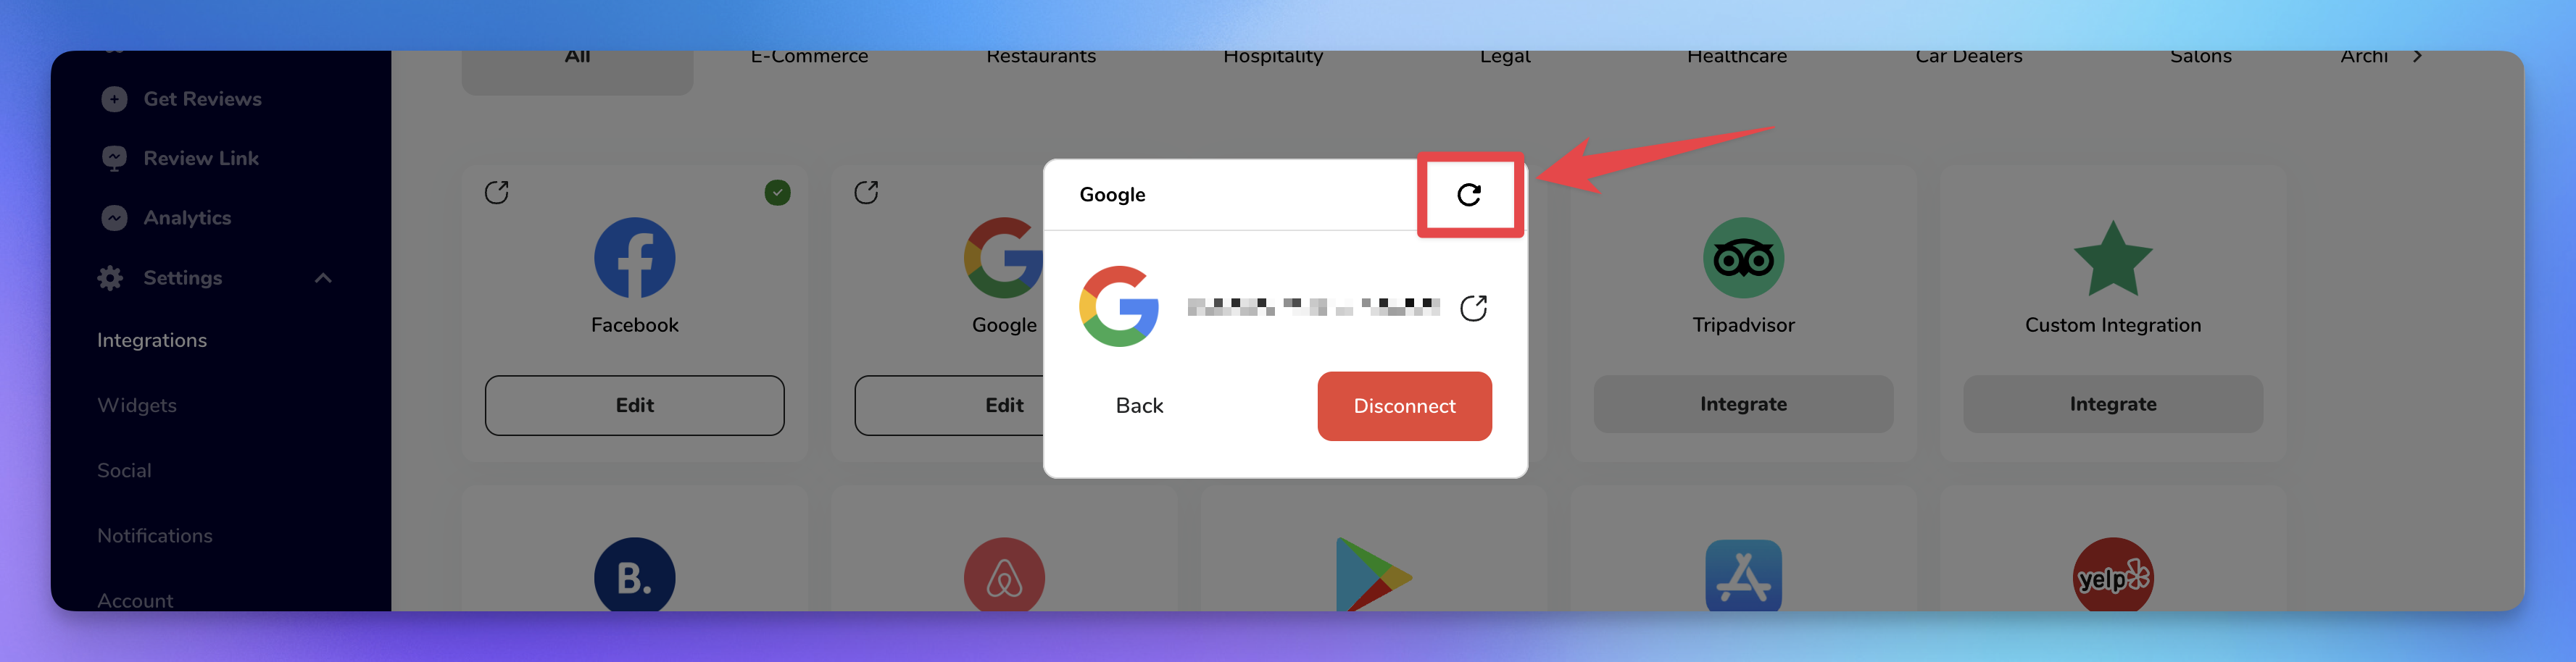
Manual Updates: To force update reviews immediately, go to "Settings" > "Integrations," choose the integration you want to update, press "Edit," and then click the update icon at the top right.
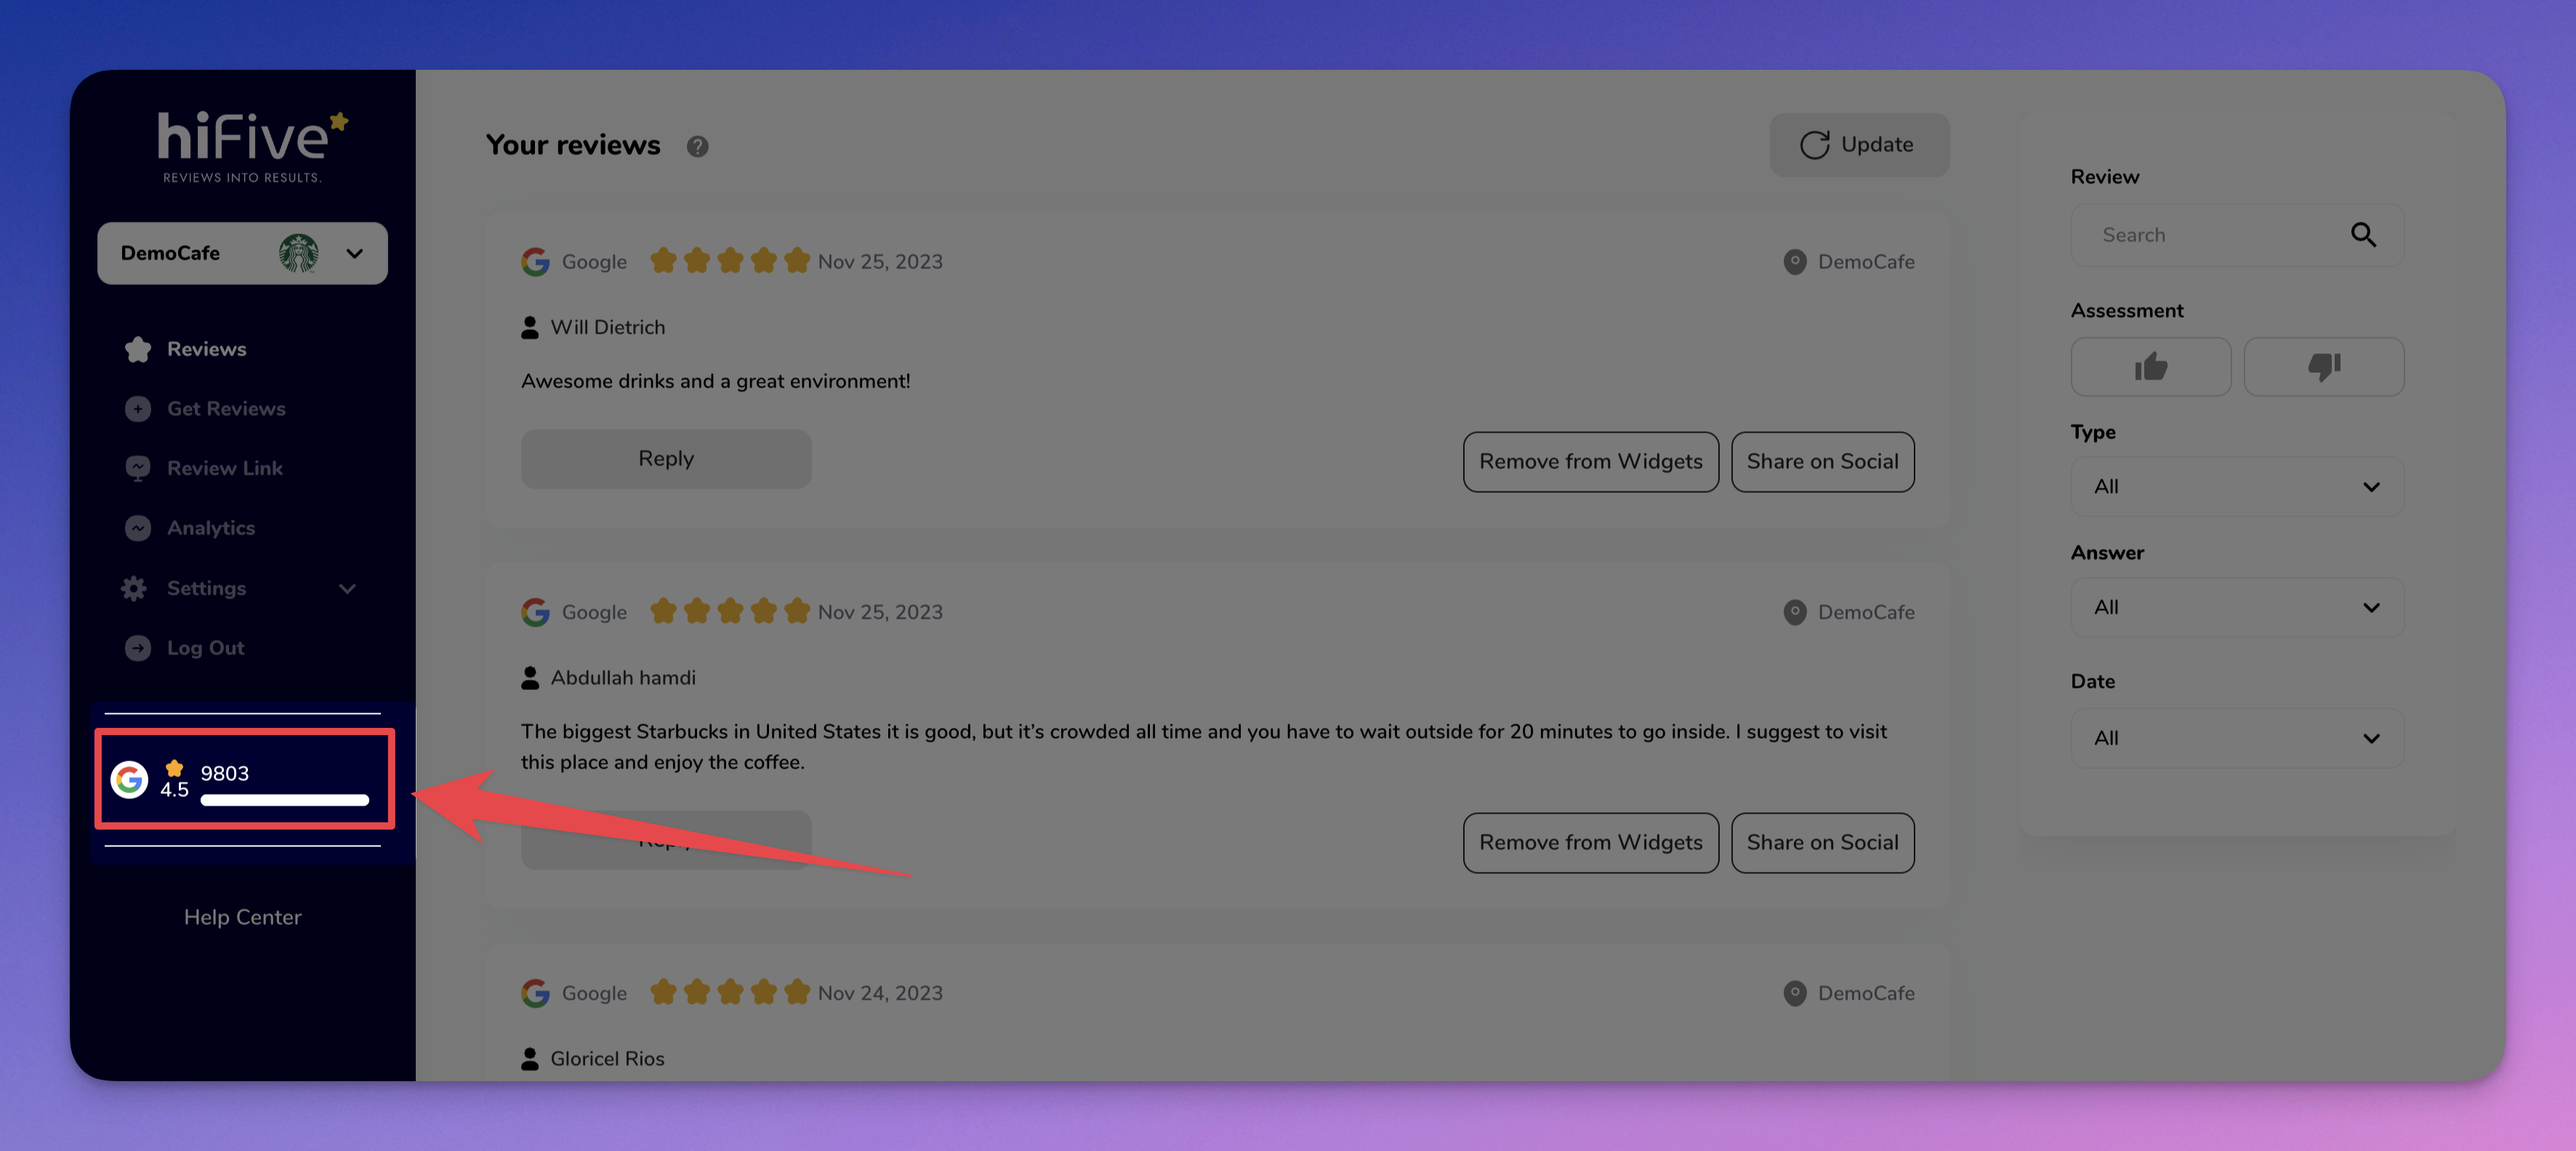
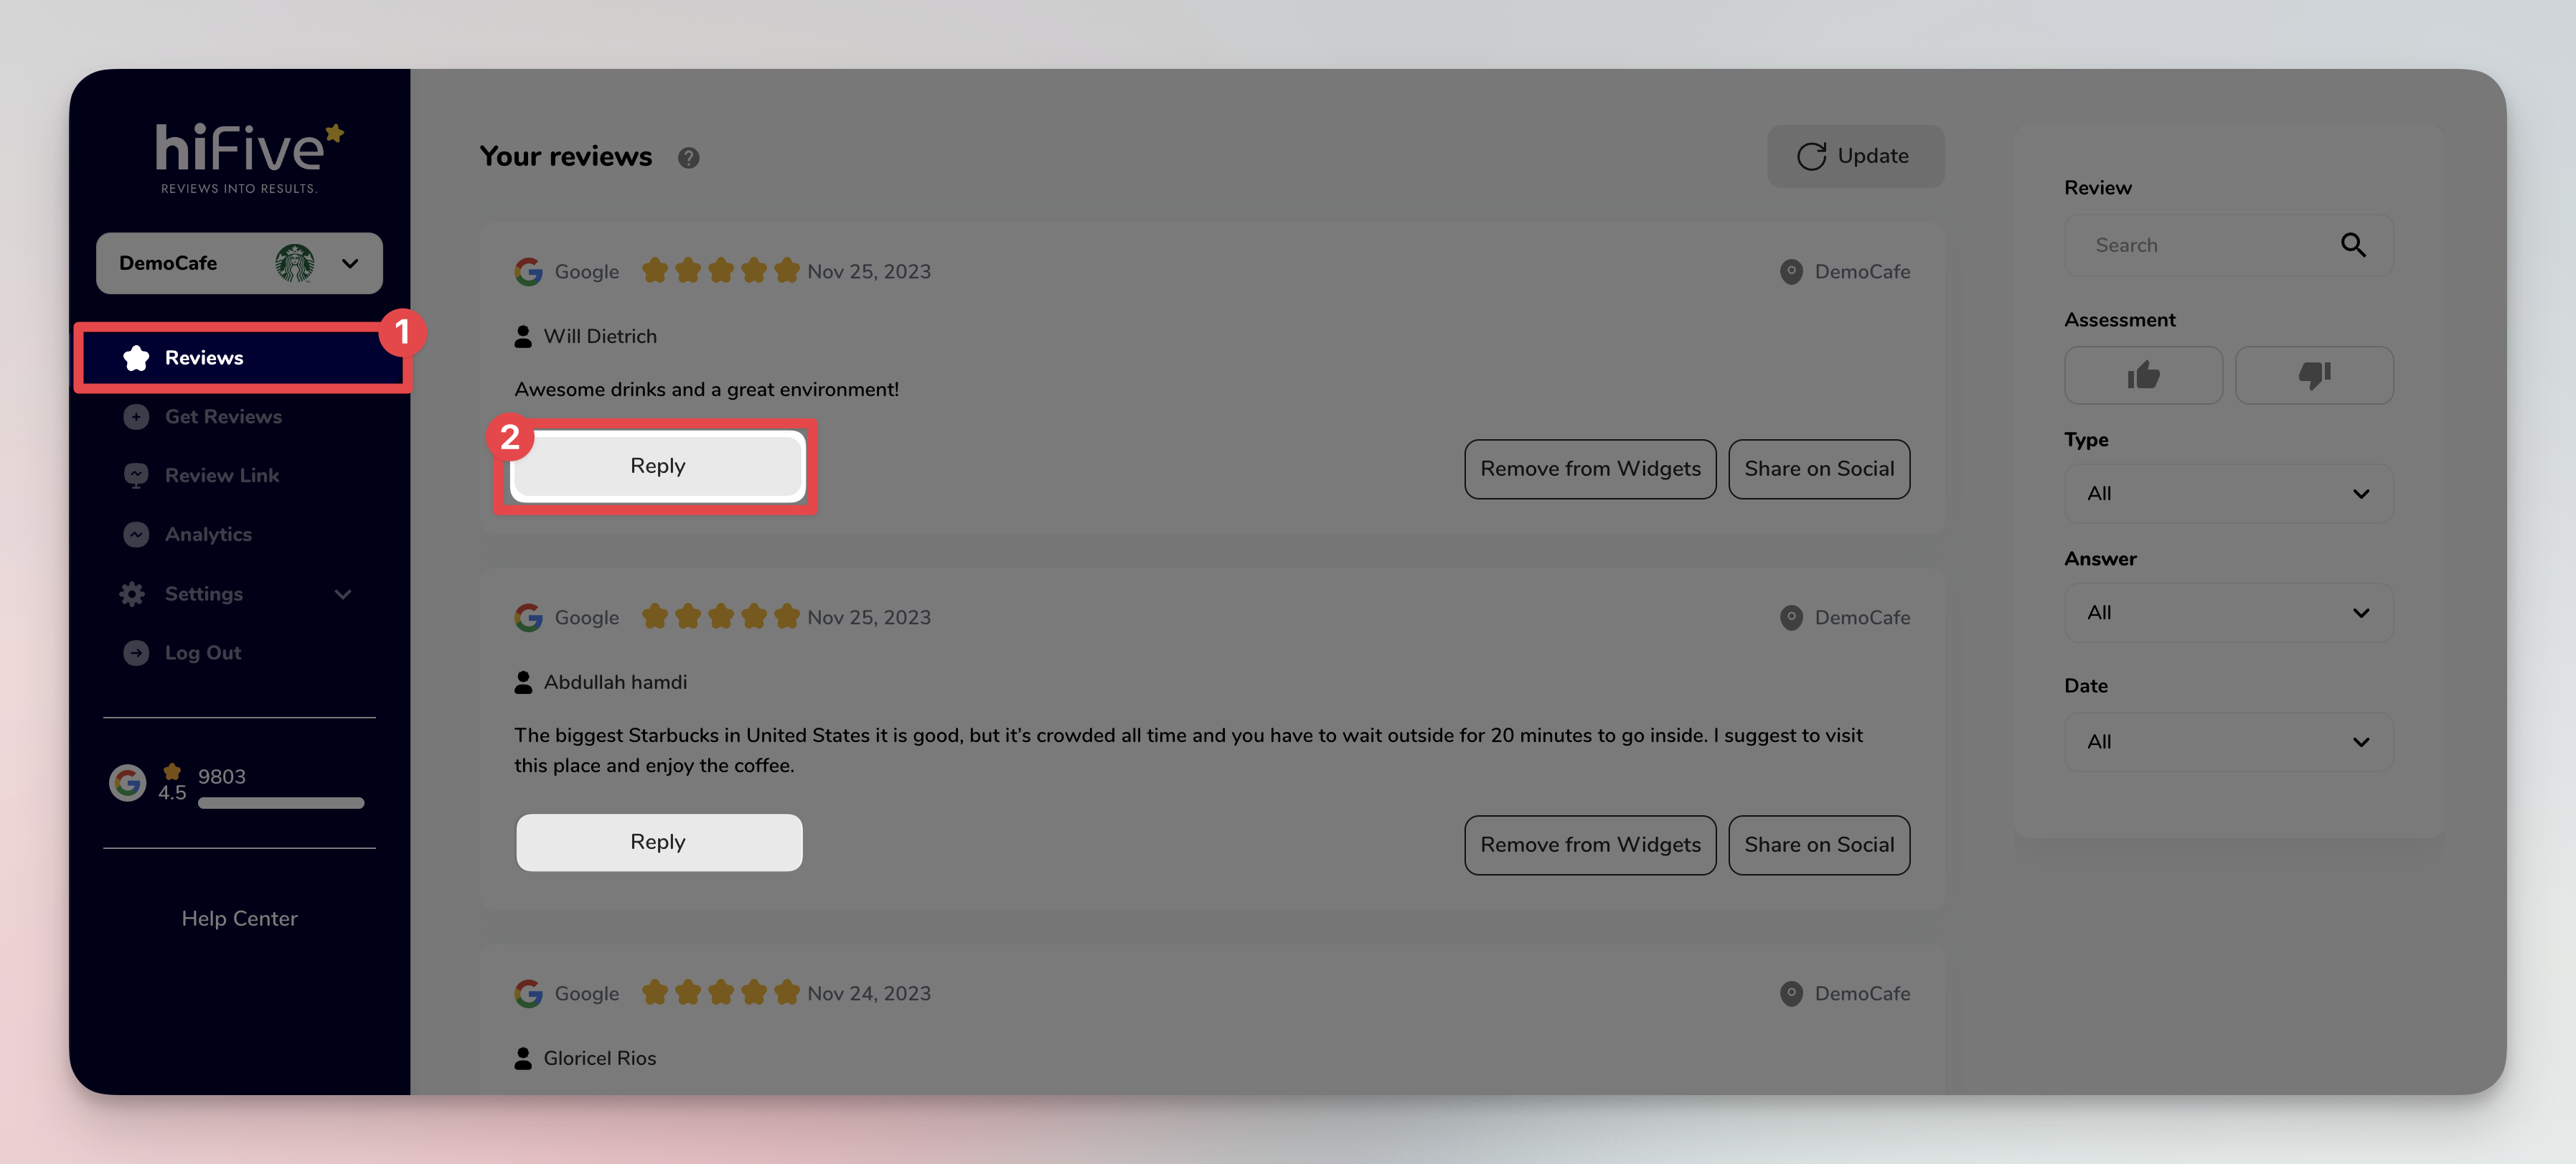
Review Overview: In the Reviews section, the left sidebar displays a list of integrated platforms along with their ratings and number of reviews. This helps you quickly gauge overall feedback across different sites.
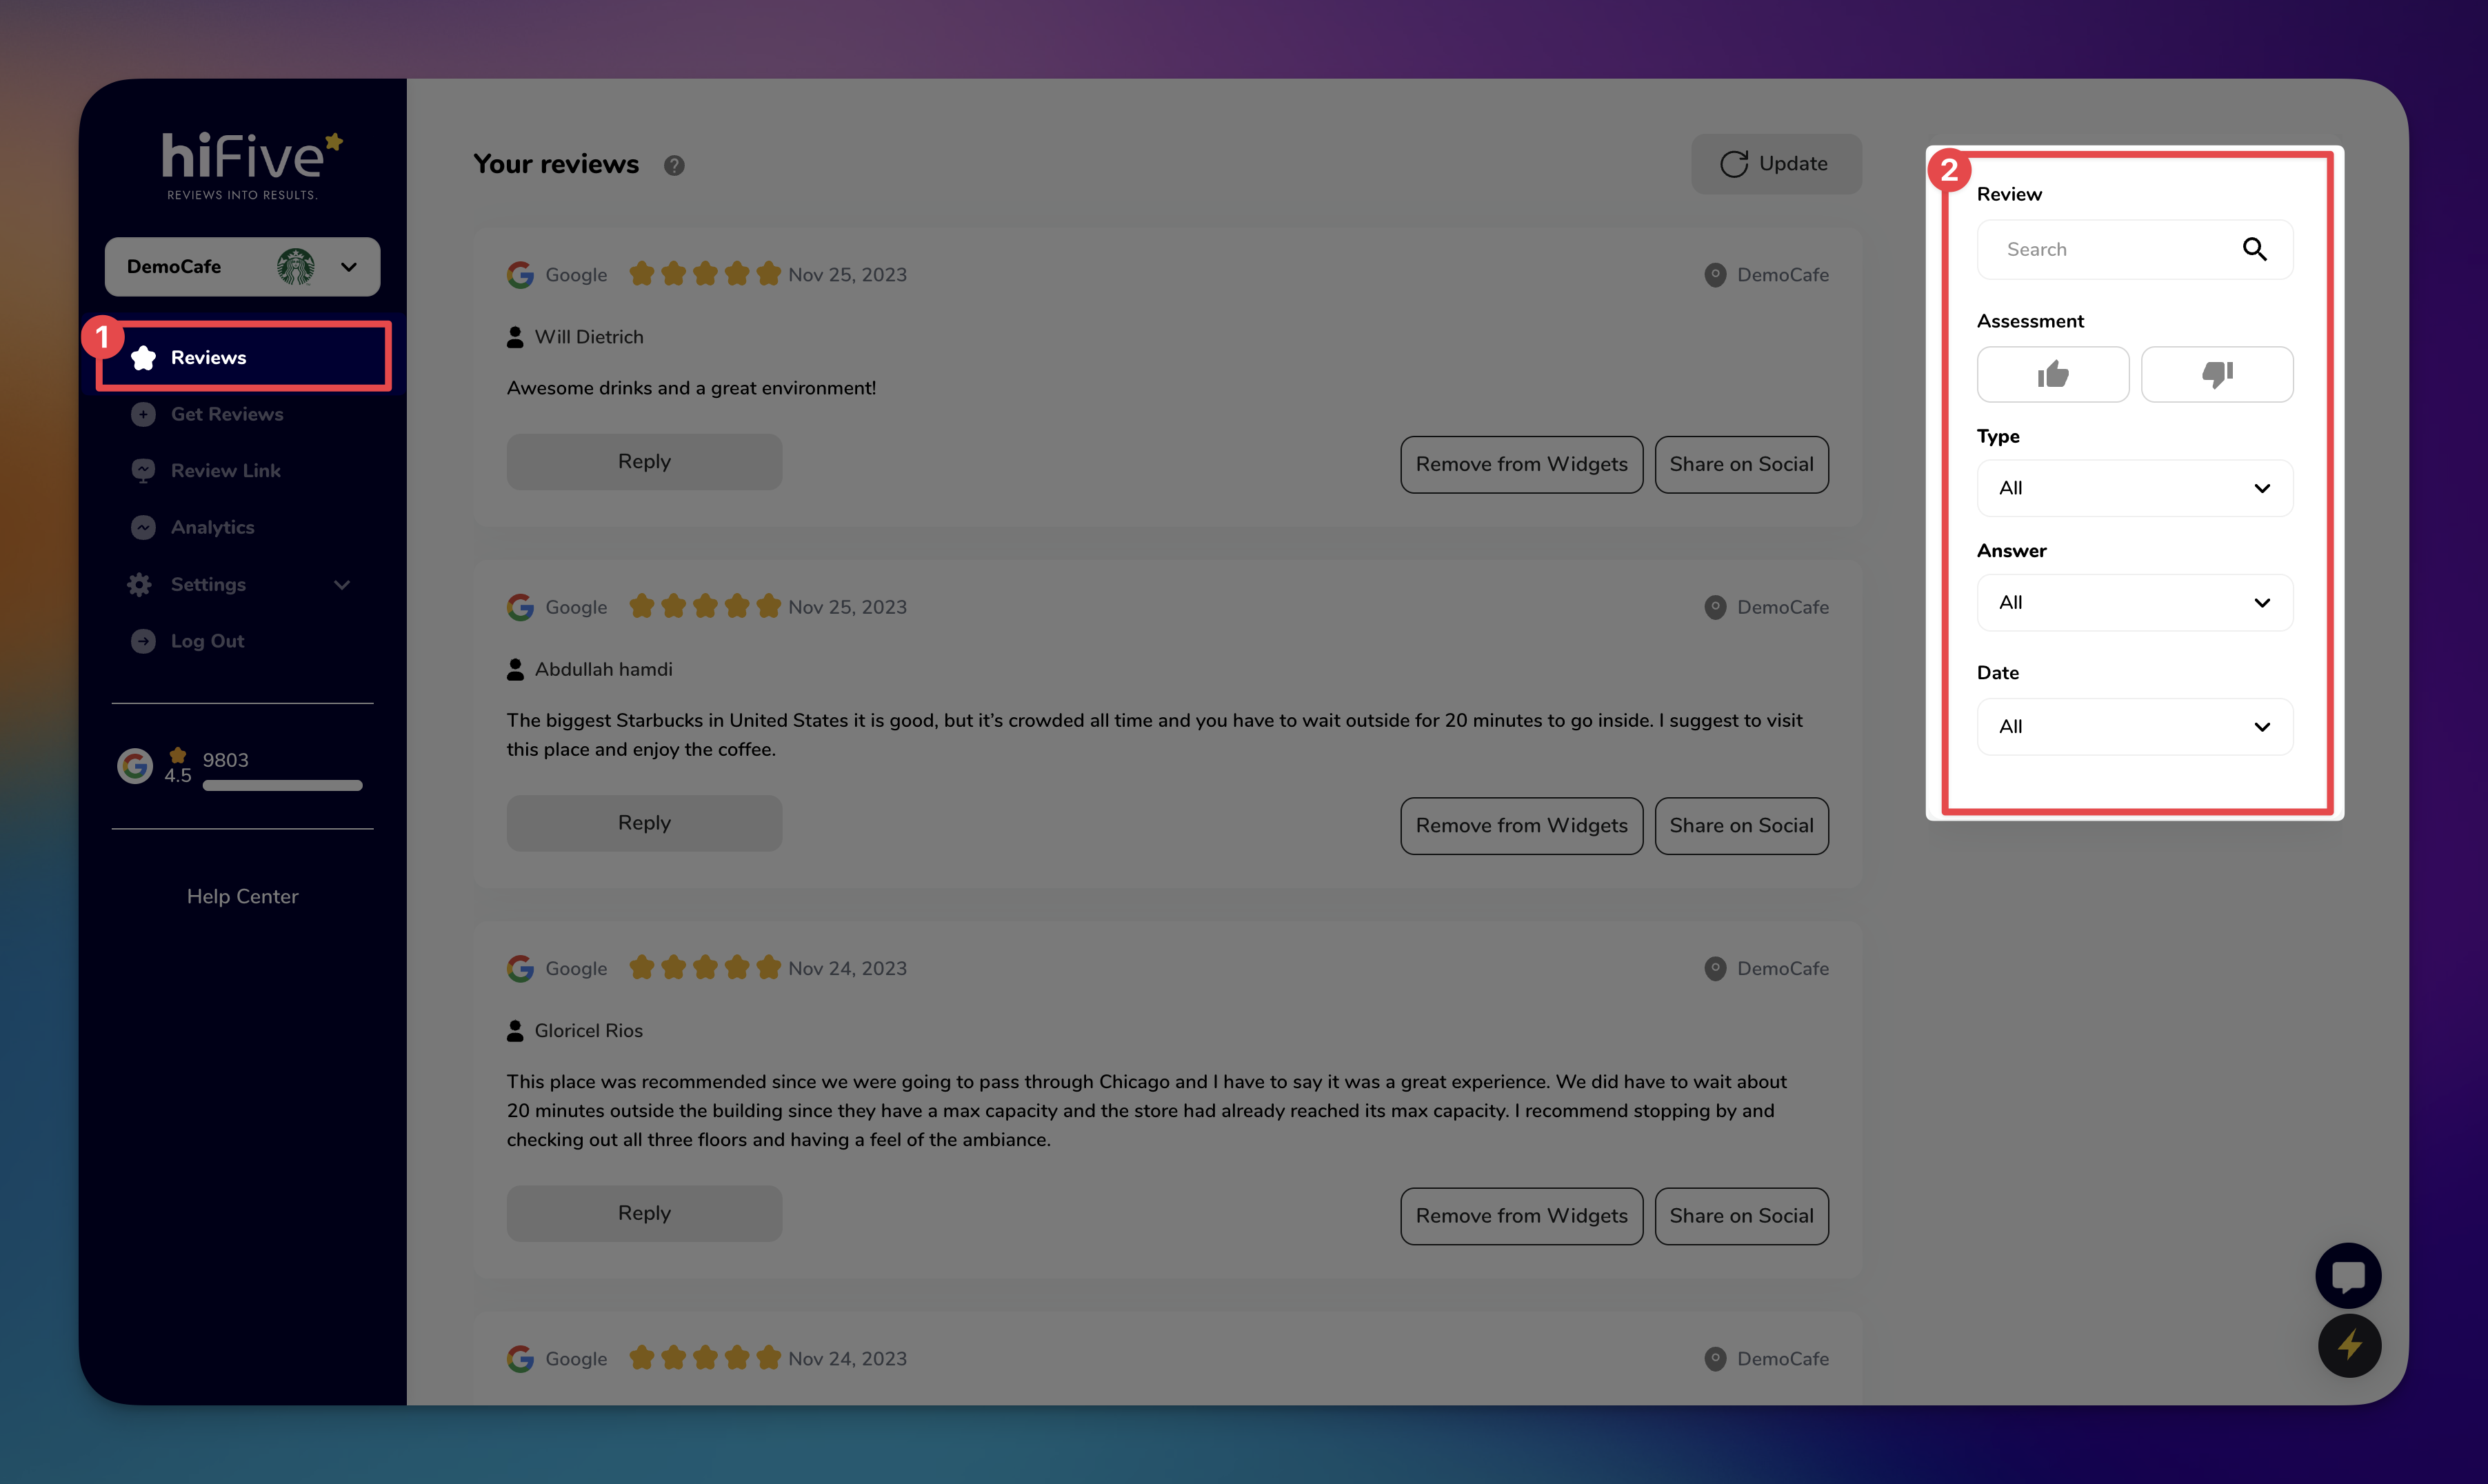
Search and Filter Reviews: Use the right sidebar to:
Search: Find specific reviews by entering keywords.
Filter: Narrow down reviews based on criteria like Assessment, Type, Answer, and Date. This feature allows you to focus on reviews that require urgent attention or fall under specific categories.
Respond to Reviews: Directly engage with customer feedback by clicking Reply under each review. This feature enables you to address customer concerns, thank appreciative customers, and display your business's commitment to customer satisfaction.
Utilize AI technology to save time by automatically generating responses to reviews, maintaining engagement without manual effort.
Steps: Under a review, select Reply >> AI Reply for an auto-generated response. Use the "reload" button to generate a different response.
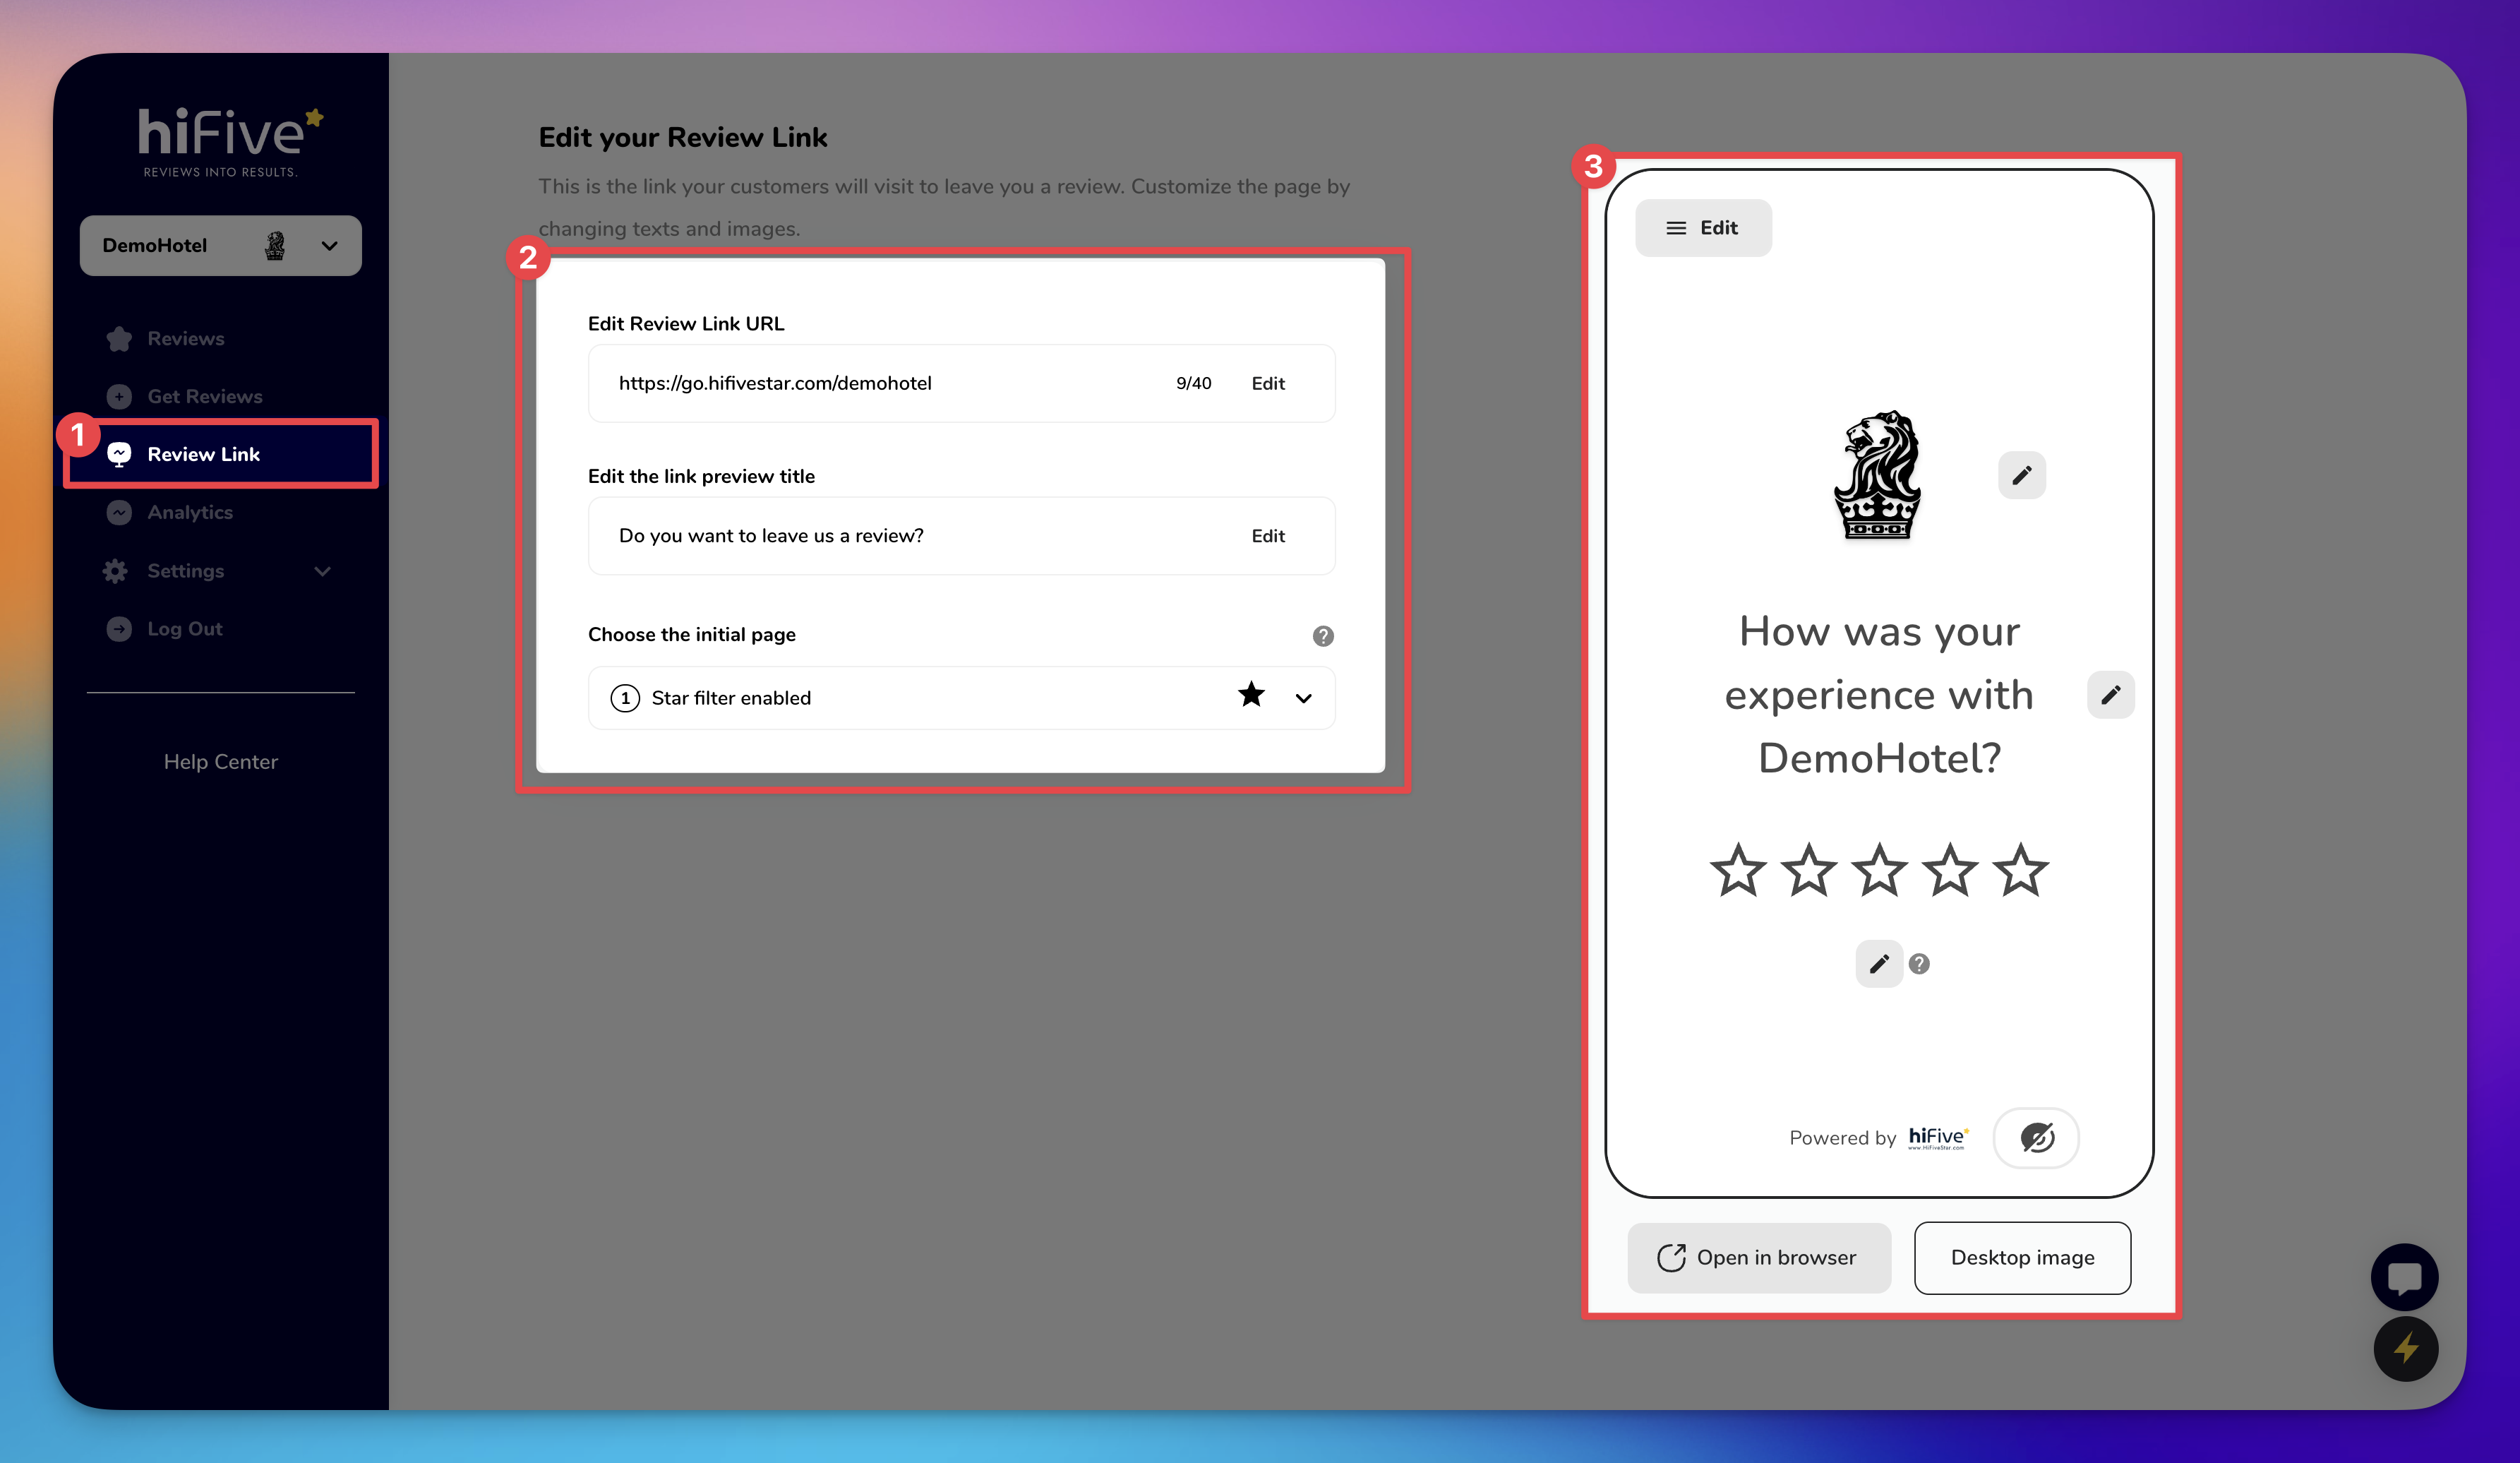
Make it easy for customers to leave reviews by personalizing the review link that aligns with your brand.
Steps: Go to Review Link → Edit your review URL and preview title → Configure platform visibility and manage settings for negative feedback.
Proactively collect reviews by reaching out to customers, which helps in building a robust online presence.
Steps: Open Get Reviews → Upload a CSV or add customer details manually → Choose to send requests via SMS, Email, WhatsApp, or QR Code.
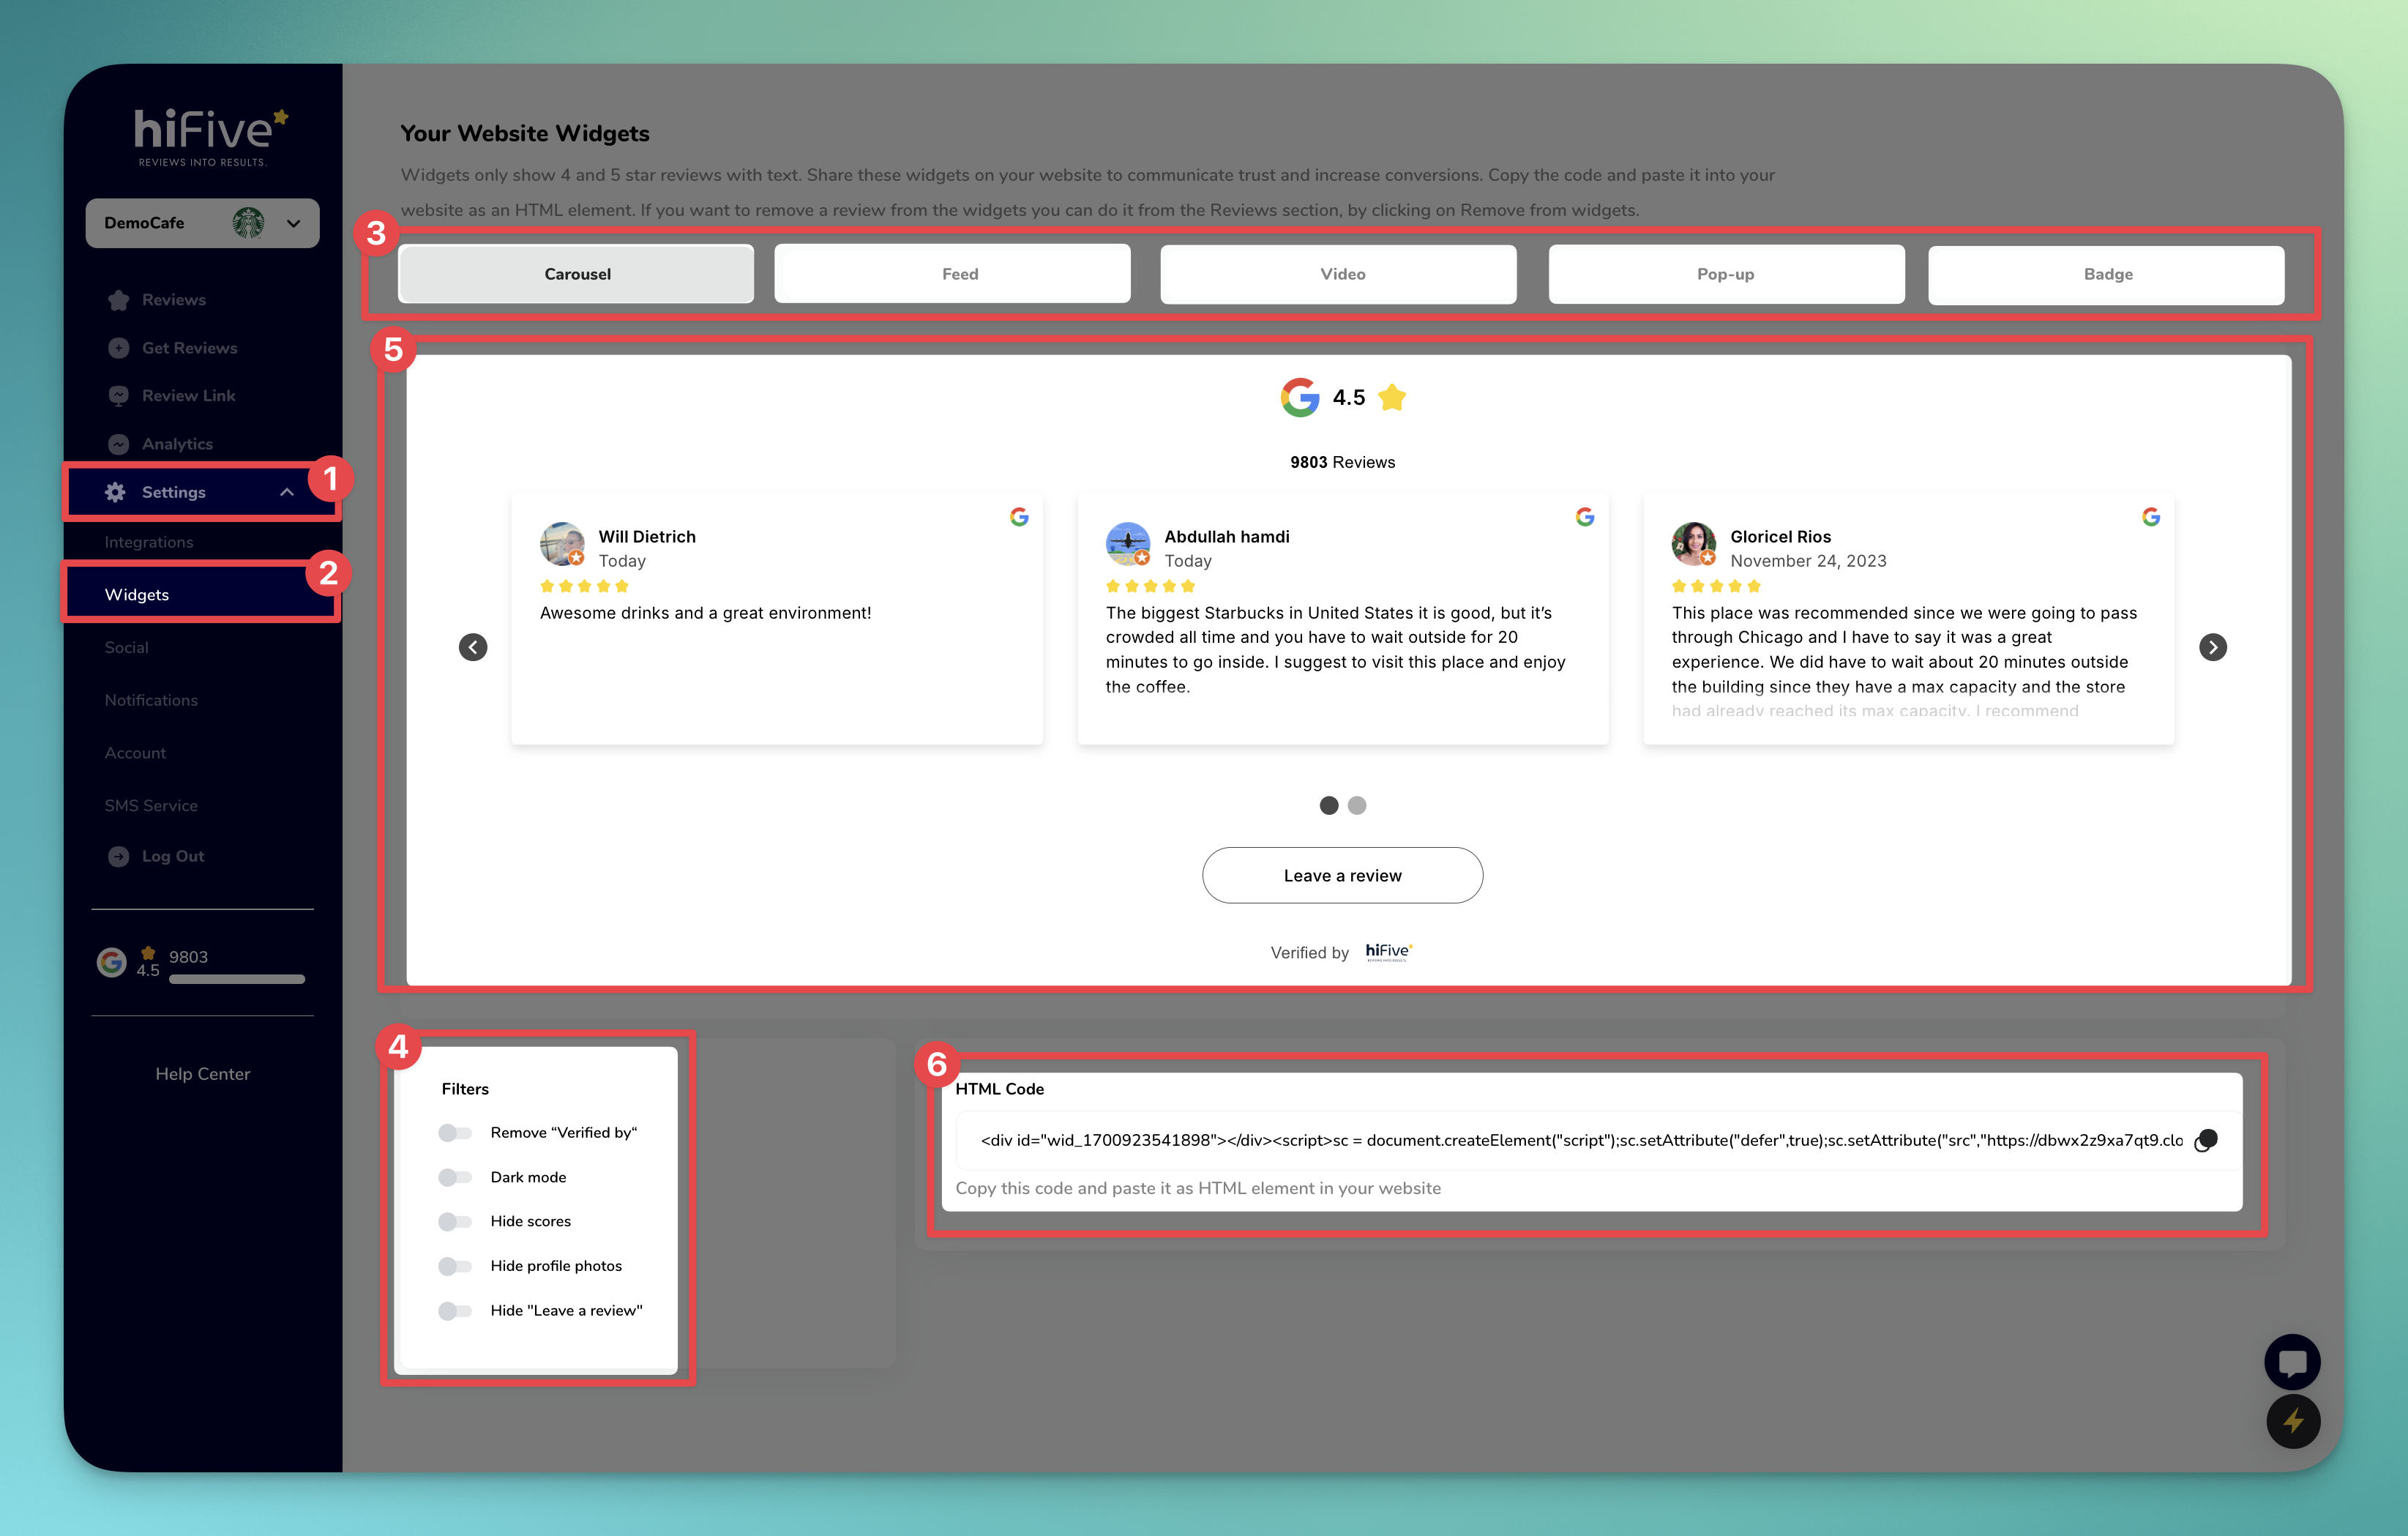
Purpose: Display reviews on your website to build trust and provide social proof to potential customers.
Steps: Select your widget style → Customize appearance → Copy and paste the HTML code into your website.
Increase the reach of positive reviews by sharing them on your social media platforms.
Steps: Connect your Facebook/Instagram accounts → Use Share on Social under each review to share.
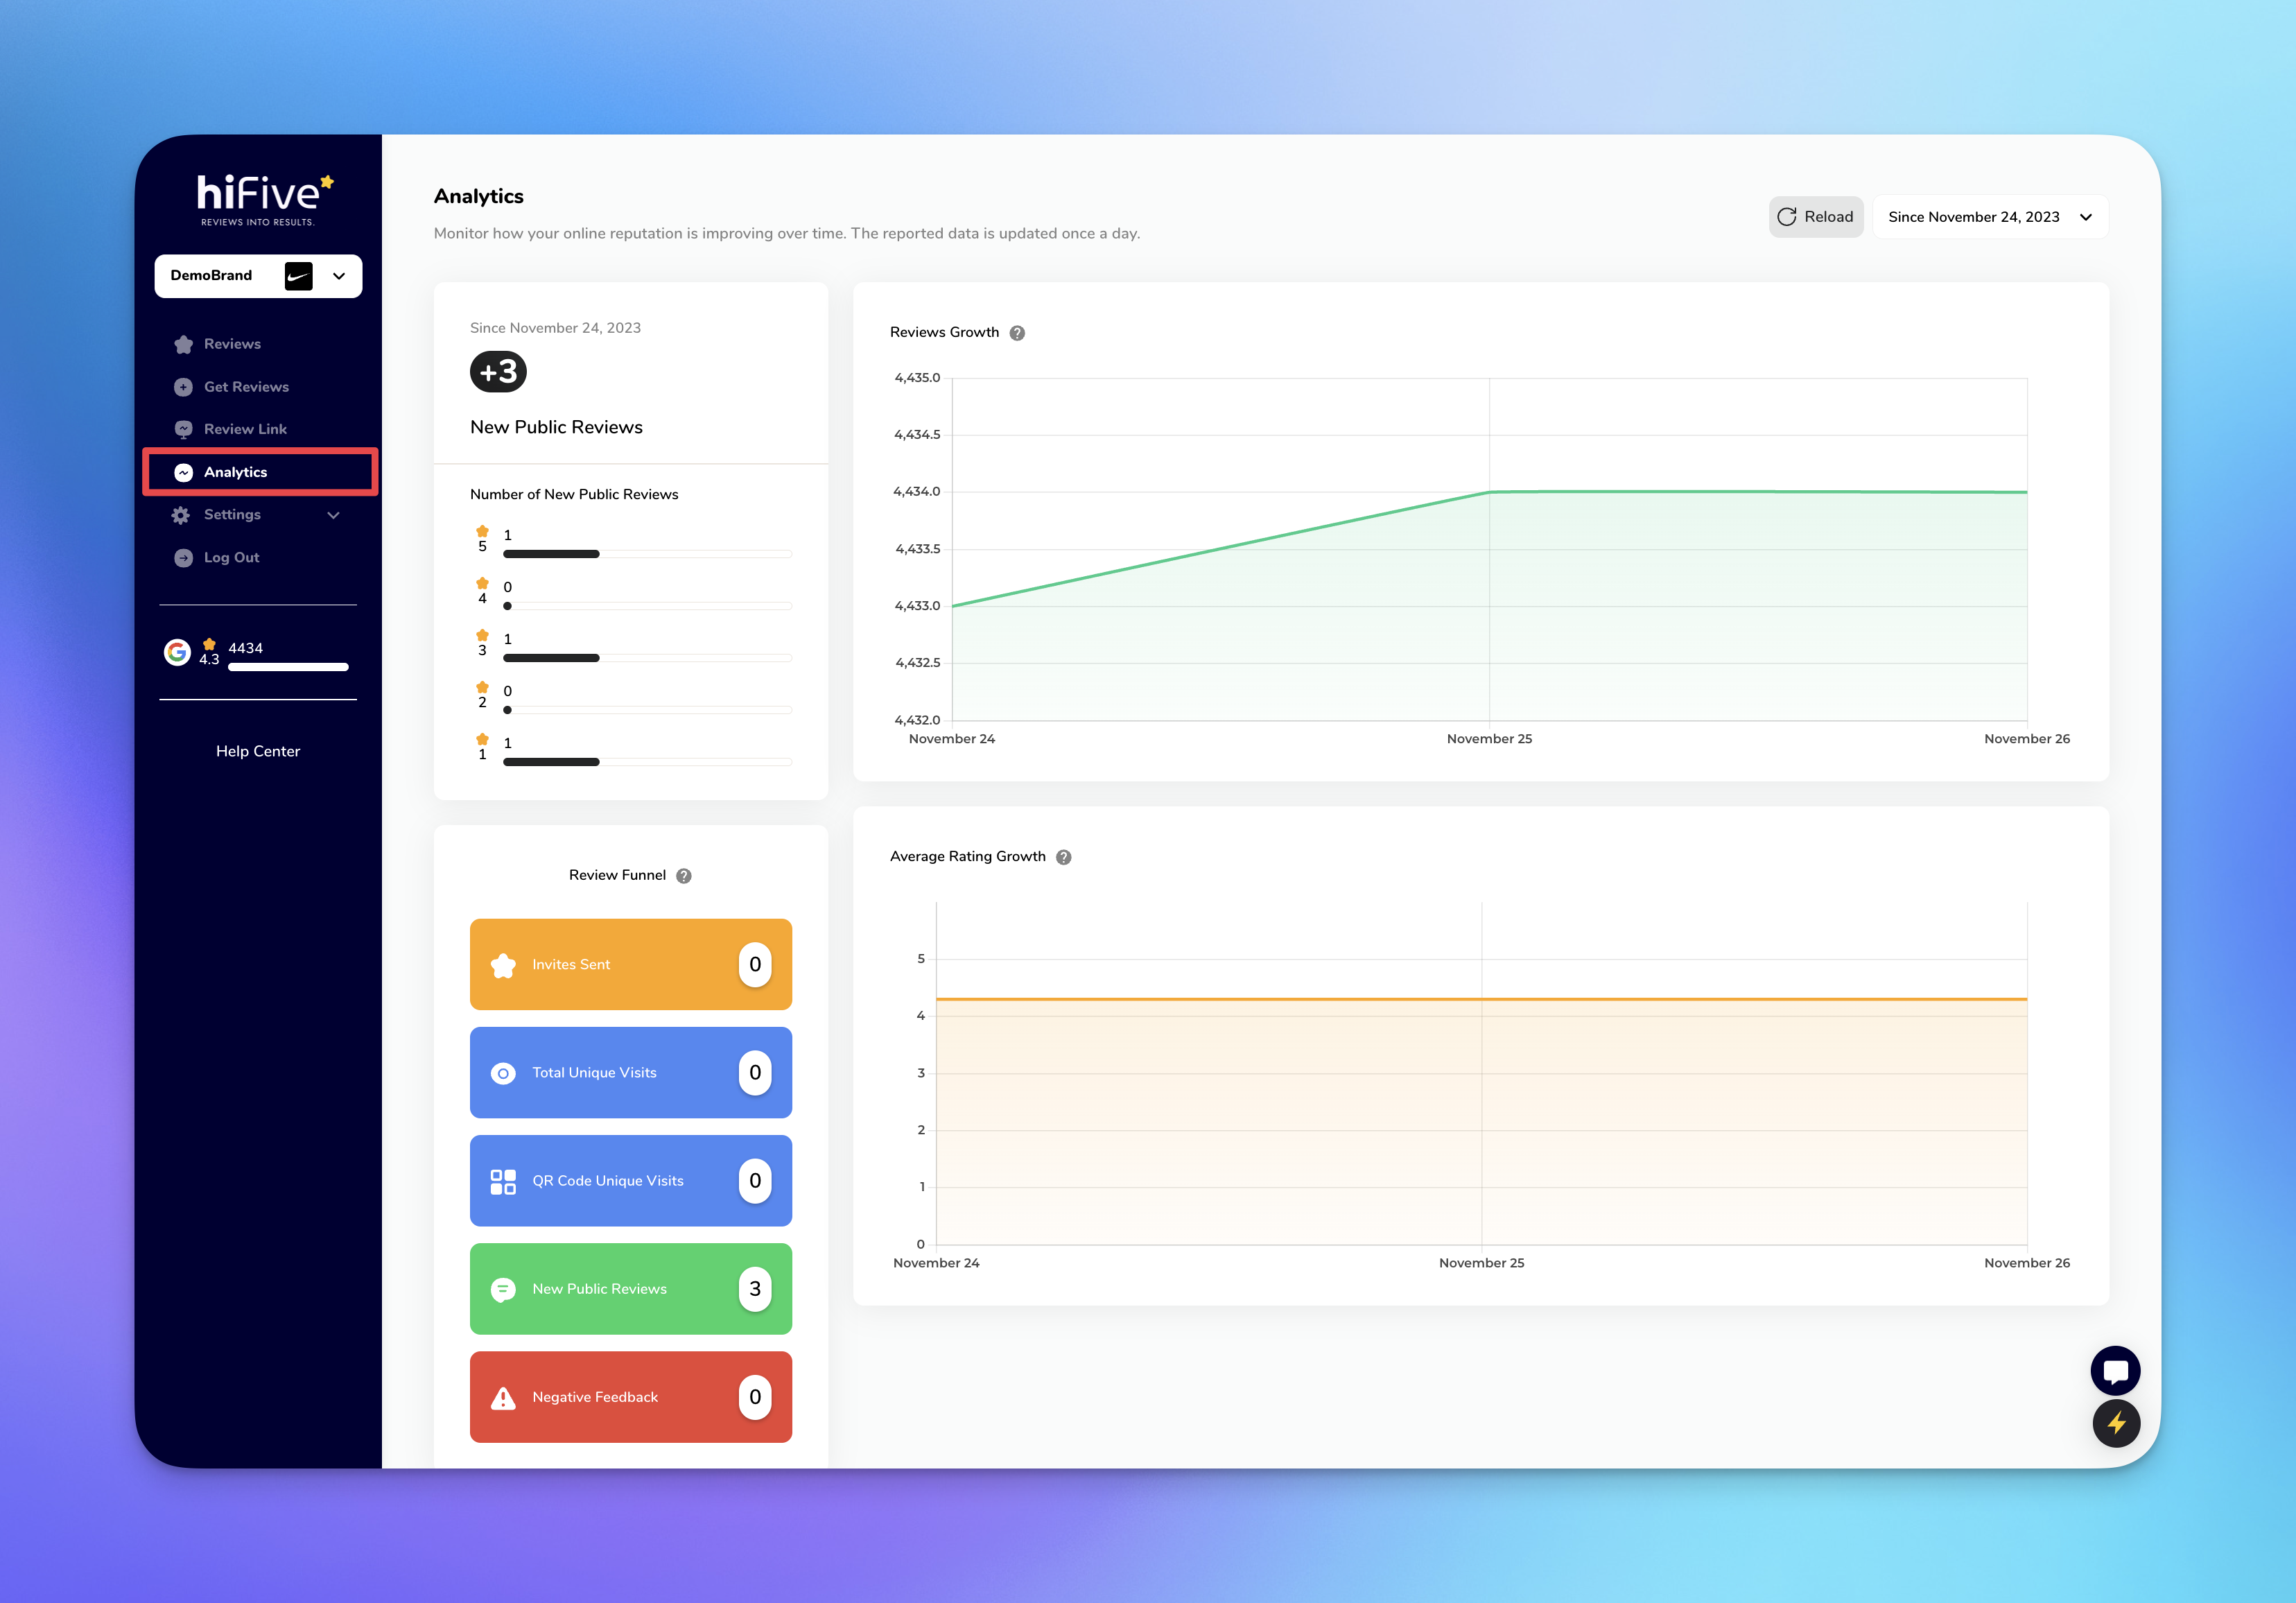
Purpose: Gain insights into your review performance to strategize better for your business.
Steps: Access the Analytics section to view data and growth charts updated daily.
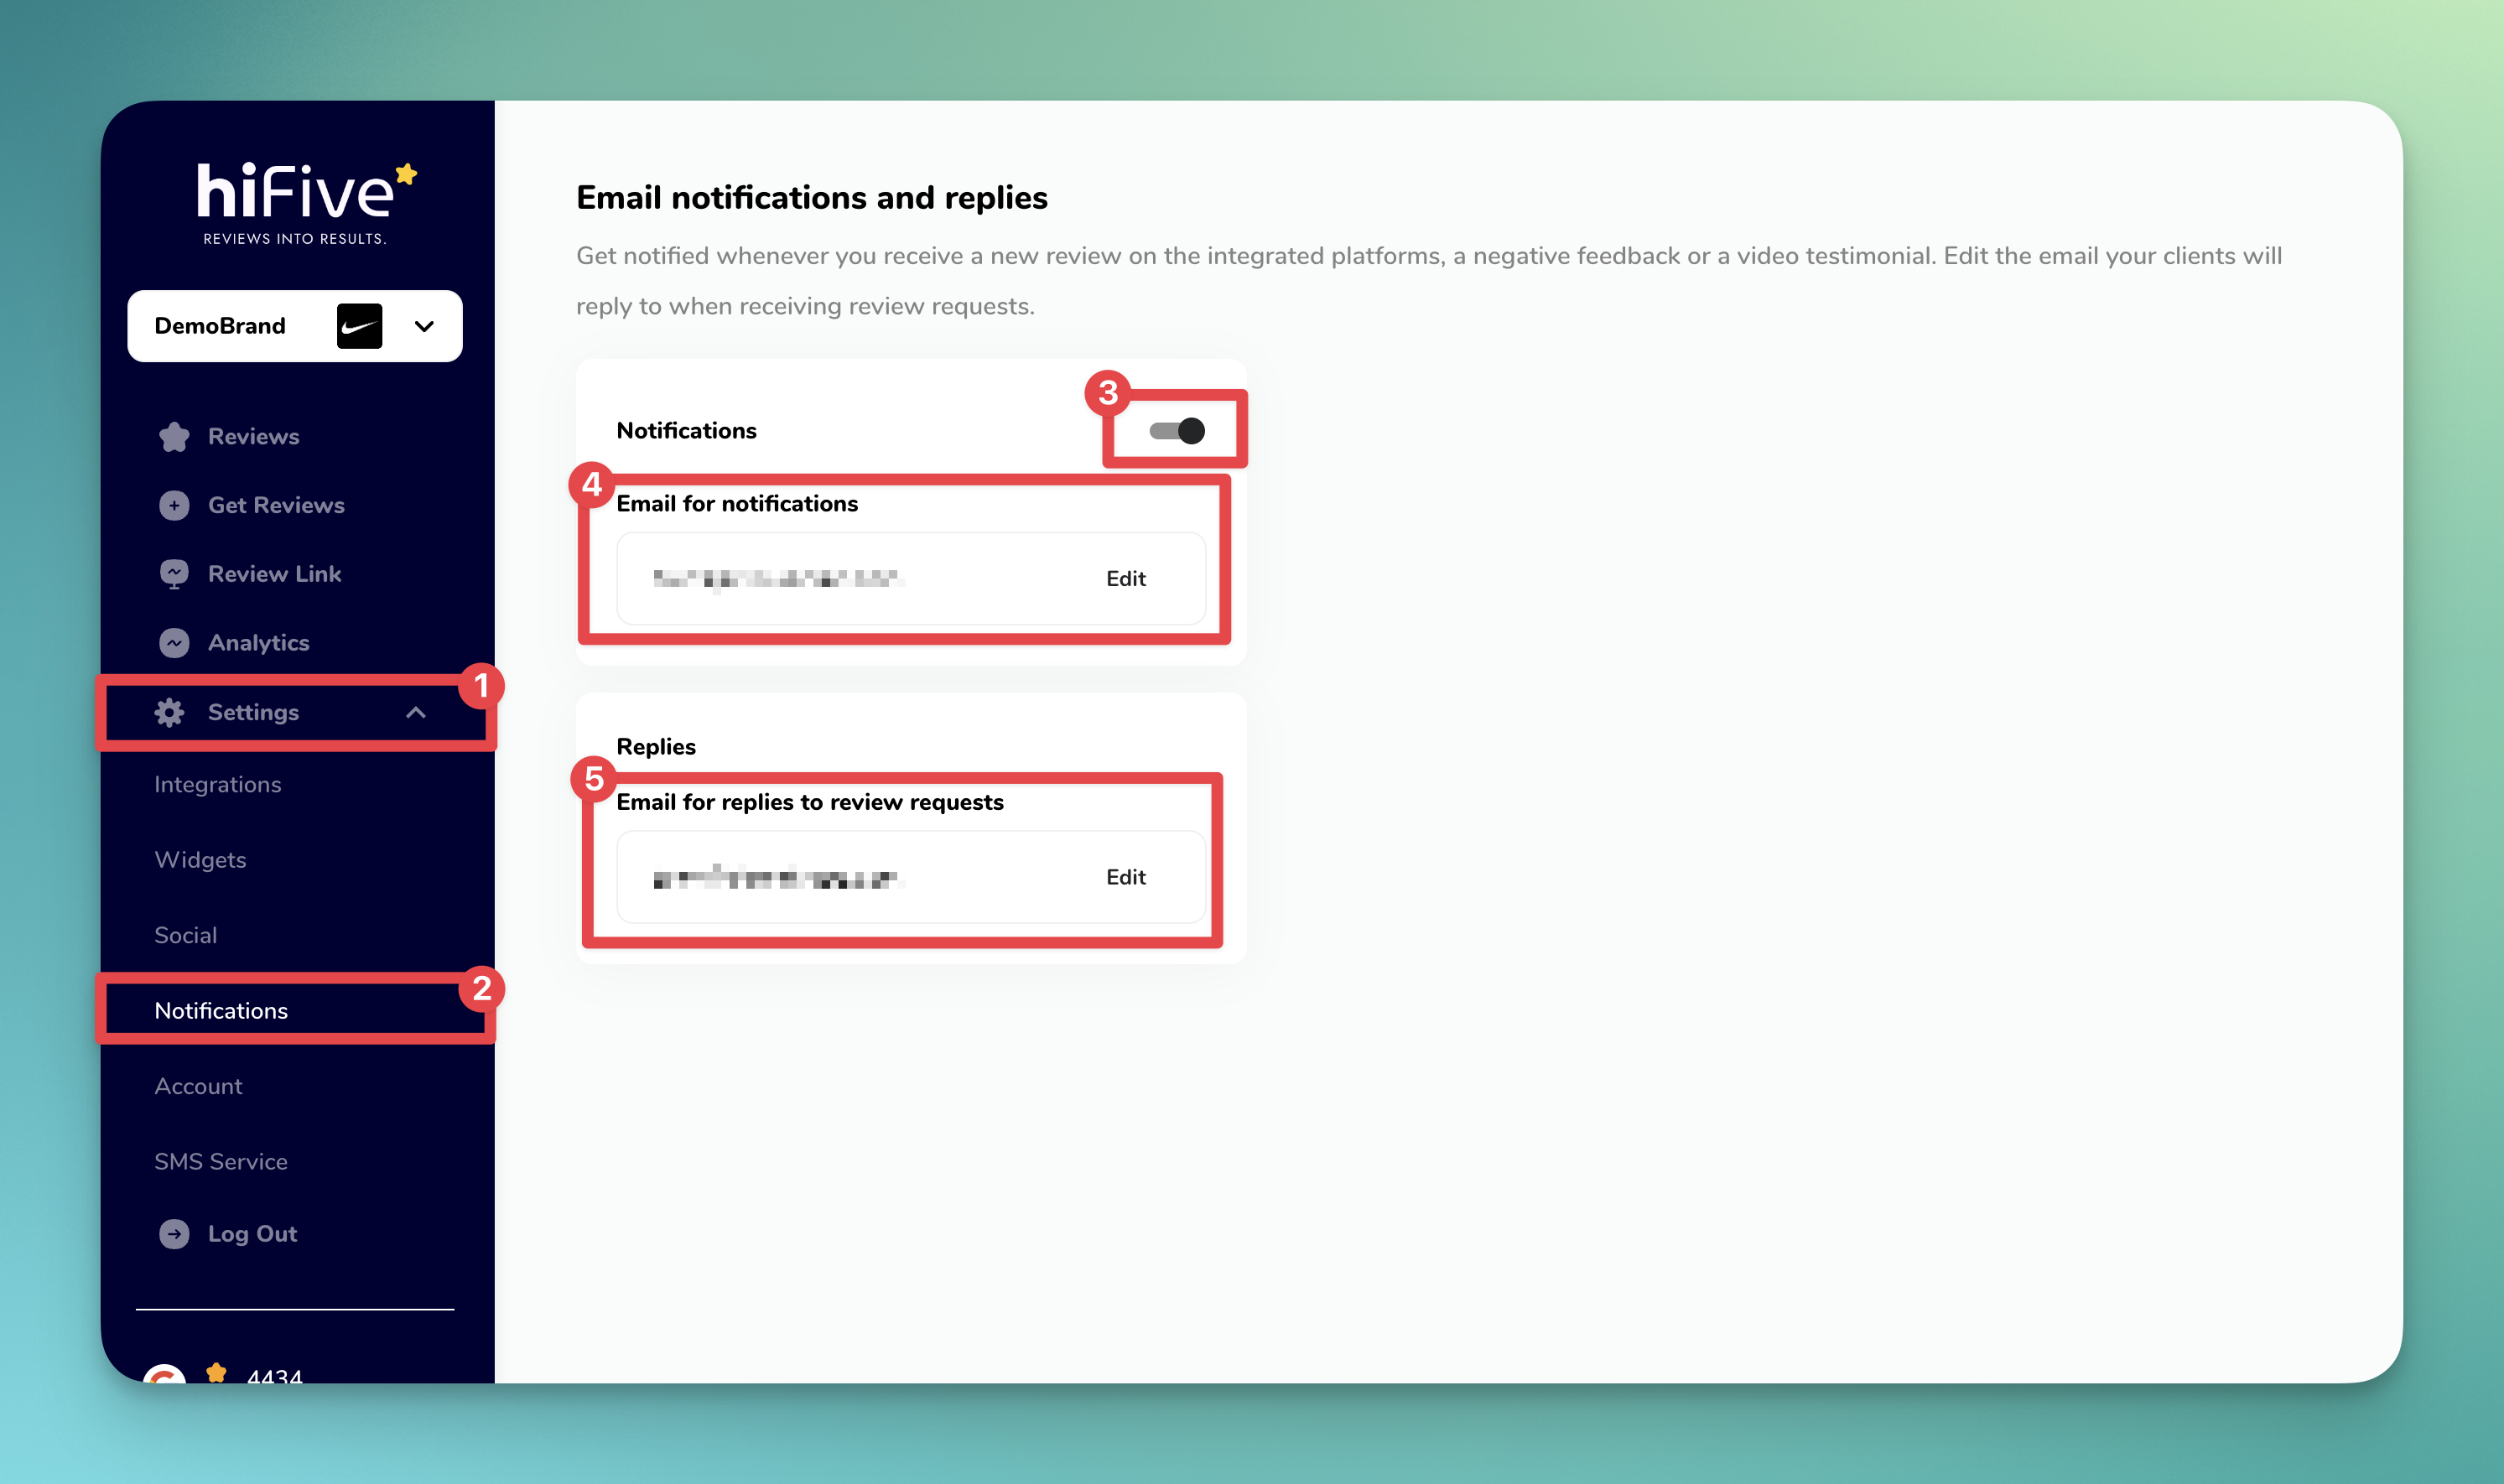
Purpose: Stay informed about new reviews to keep a pulse on customer feedback.
Steps: Go to Settings >> Notifications → Input your email and turn on notifications.
Congrats, you're all set! 🎉🎉
You've completed the Quick Start Guide and are now ready to make the most of HiFiveStar. Begin enhancing your customer engagement today! Good luck! 🌟
Secure your account by updating the default password received in your welcome email. This prevents unauthorized access.
Steps: Sign in → Go to Settings >> Account → Enter and confirm your new password → Click Save.